Monday, October 12, 2020

I still want to make dolls!


Well I let this blog go stale, and I am challenging myself to not only to get back to blogging, but back to making dolls.   What to say ?   I have been busy ?  Too many distractions ?   All of the above, the drive to create is still burning, just waiting to bust out!

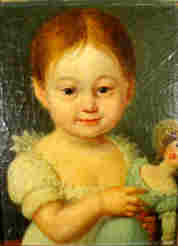
These two sisters I made about 10 years, and this is still the type of doll I want to make .   I am looking for my way back to creating, and here is hoping I will do better in 2021,

Sunday, March 18, 2012

WIP, Easter Egg Dolls


This is a convoluted 'Work-in-Progress' post that demonstrates my adult 'attention deficit' approach to doll making. I get very little doll work accomplished, but it does relax me and makes me happy :-) I have done a lot of business travel this past winter, and thinking about all of this and doing searches on my iPad has been a great way to deal with airport delays!
So my original goal was to finish some unfinished sculpts I had done several years ago. I wanted to experiment with a couple of new techniques since these originals were done in paper clay and in general they are too big for my current taste. At first I was worried that the paperclay was not quite rigid enough, and they would dent when they tip over or fall to the floor (I intend to let grand-children play with them) . After consulting with several doll makers, the general consensus was to do a cloth over type technique. This works best with a bald head, but my creations had sculpted hair. Two of the three heads I was content with the results, but the third (the middle head with the most detail ) I was unhappy, and ripped the fabric off. She is now a bit damage and will need some repair. However while working with her, I know now what type of doll she will be-- she is a mermaid and will not be a doll to play with, so I have abandoned the need to do a cloth over for her. As a fantasy type doll, I realized I wanted to do a different type of painting which lead me to a new digression.. working with pigments. . I typically paint with oils in a painterly type of style that works well with a folk art style. I think this lovely mermaid needs a more delicate application of color, and wanted to try pigments using a chalking technique. Chalking approximates the look you get with a Parian doll in porcelain in that you build up transparent layers of color that is matte. The backup option would be to use watercolors, but I really was motivated to try chalking. This requires a perfectly smooth, matte surface which lead to yet another technique that might enhance the look I am after.... gofun! In traditional Japanese doll making, the wood sculpts are covered with a 'gesso-like' material made from crushed oyster shells and hide glue. This material can be sanded and burnished to give a hard, eggshell like surface to paint. The problem with the gofun idea, is there will be some trial and error experimentation that needs to be done to figure out the correct ratio of glue to oyster shells to get the surface I want. I did lots of internet searches on Gofun, but the recipes are not consistent. So this lead me to the final craziness... I wanted to create a series of heads to test recipes. I had a mold of one of my original sculpts that I thought would be fine, and I could sculpt over them (hair) which would approximate the surface detail in my mermaid. So as I am sculpting these gals, and of course I get attached to them and want them to be real dolls. I pulled out my Hertwig parian dolls, gazing at them and said 'Oh My', these test dolls I could dress in 'Easter Egg' colored dress. So I am currently pouring and sculpting my test heads, and looking at Easter Egg colored batiste. I wonder if I will get any of these dolls done :-)


Saturday, March 03, 2012

My New Collection, A is for Annabelle Update


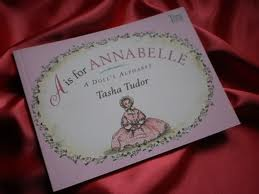
Early on when I started this blog, I shared one of my many doll obsessions of having my own Annabelle doll , trunk, and accessories as described in the classic book by Tasha Tudor 'A is for Annabelle'. At that time I was painting 10 inch papermache french fashion dolls and making tiny clothes, but somehow that didn't quite satisfy me. I kept looking at antique dolls and wishing I could create a collection of antique dolls and accessories. I looked at antique fashion dolls for years, but never found one that really spoke to me. I found her this spring. I must have haunted the website where she was offered, since I could not get her out of my mind. So eventually I knew I had to purchase her.
She is a German made ( maybe 1870s) bald and wigged china which had the most serene and charming expression. She was my Annabelle, and I knew it right away. To me she looks like a young lady, not quite yet a woman. She captured the excitement and delight of pretty clothes, ribbon, and pretty flowers captured in Tasha's classic book. As I was searching antique online doll listings, I also found a damaged shoulder head, a German Kling china head that was actually a boy. His head is perfect, but unfortunately his body is in poor condition. But the price was right and I thought, fantastic, Annabelle has a little brother. I am still on the hunt for a china baby ( rare and likely costly), but haven't found the right one. You might notice the frozen Charlie doll in the group shot. I purchased him thinking he would do, but I think he is too big to be in scale with the other dolls. He's pretty though, isn't he! My most recent acquisition is an antique trunk big enough to fit them all in, and you can see my dear Annabelle looks wonderful sitting on the lovely tray. So my ambition is to someday have a set of clothing for Annabelle and her brother and a few accessories. My current thinking is that I can make some new clothes (from antique fabrics), but I should try to find a couple of antique gowns and accessories. And lastly, I am slightly re-interpreting the Annabelle story to reflect a big sister and her younger siblings. Somehow that feels right to me!

So here is my questions, what is Annabelle's brother's name ? If you have any great ideas, please leave your suggestion in a comment!

Ta Ta for now my lovelies!


Sunday, September 18, 2011

Doll Trunks


I have been fixated on doll trunks recently. The first couple of images are a trunk for doll house size dolls (in this case some antique german dolls) , although they poor dears lack some clothes ! But I wanted to experiment with collage and 'mixed media' techniques. I think the little purse trunk is cute, and I really need to prioritized some clothing. The idea behind this one was a travel trunk to a vacation spot - the beach! As is typical for me, I gathered 5 times the number of images I need, and this little purse is only 7 x 5 inches! This is also my first attempt at textured techniques using stencils and artist pastes, and using Golden's interference acrylic paints. My they are addictive, and something I will have to use with caution, or everything I paint will glow in the dark!


This second trunk lid, will be for an Izannah Walker reproduction doll I will make at a Gail Wilson retreat in a couple of weeks. I must say I am embarrassed on how poorly the painting is coming along. I think this is clearly a case of where my painting skills are slipping , and I need to devote more time to them.... This trunk is also a papermache oval hat box shape, and will be covered with fabric ( civil war print) . The lid is also covered with fabric, but I have tried to paint a folk art style portrait . I think its the three quarter view which has me all screwed up. I will let this dry ( oils) and see if I can add more detail and depth next time. She's looking too cartoonish for my tastes! Also antiquing is a marvelous way to hide all ills!


Sunday, July 17, 2011

My Challeges of sculpting Historically Referenced dolls


To begin with , I want to credit doll artist Susie McMahon with introducing me to the term 'Historically Referenced' dolls, a term that fits very nicely with allot of my doll work. I love old dolls, and often use them as a jump-off point for my own work. But how do you know if you have something timeless, like the old dolls you love, but also make the doll your own ?


I am taking an online class with Gail Wilson where we are creating a Queen Anne doll , including a marvelous hand carved body. I encourage you if you are interested in making your own Queen Ann, to check out her class. Its a real bargain considering you end up with a wooden doll, completely hand made. You can get more information at http://www.gailwilsondesigns.com/ . I am a big fan of Gail's style of historically referenced dolls, because she gets the balance of recreating the 'essence' of the original doll, but also puts her own artistic stamp ( her original sculpts).


I was overly ambitious with her class, and decided to order an extra body to carve, which I wanted to add my own hand sculpt head. So I will end up with a doll of Gail's design, and one hybrid doll with Gail's body, and my head. The pictures summarize my first efforts to sculpt a head. There is allot of refining left to do on this head, but honestly, I am disappointed with what I made and am trying to decide if I should start again, or press on with this one. I am not sure it 'goes' with the wooden body. This brings me to what I wanted to blog about, how to find the balance in a historically referenced doll of your own style, but make clear what classic doll is inspiring your work!


My original idea was to make the doll look like a peg wooden of the 1910's and dress ala Jane Austin style. I had looked at some carved wooden dolls, but didn't refer to them as I sculpted... I just wanted to go with it... and I am not sure I like where I went. I will add sculpt hair on this one, and will wait to judge if she belongs on the wooden body.


So what is it that you need stylistically to get a peg wooden doll that nods to the 1810s ? I am looking at these dolls ( from John Darcy Nobles book) and although there is often a high degree of realism in the sculpting, there is also some stylistic elements. Namely the features are further down on the sculpt ( bottom third to half of the head) than my head. The rest of this, I am trying to figure out. If you have any suggestions, feel free to comment.


It is my opinion my own sculpting style works well for late Victorian and Edwardian style dolls. What do I need to do to reflect an earlier time period ?


Sunday, July 10, 2011

Wigging and Clothing the Naked and Bald


I have had a trying spring in terms of my favorite creative outlet... doll making. At the end of May I was bothered by a pinched nerve in my upper back which caused numbness and weakness in my right hand. I am allot better now, and healing, although I am still have trouble with the right hand, so I am not terribly motivated to work on painting or sculpting projects and ruin something in progress. But like many doll enthusiast, I have quite a backlog of old doll projects. So pictured is a group of porcelain dolls I finally wigged and dressed. I want to point out that I DID NOT make these wigs, but rather these are beautiful creations from Wendy Feidt who makes the most wonderful mohair wigs. These porcelain dolls I painted and I am partial to, and wanted them to have nice hair. For those of you knowledgeable about antique dolls, these are reproductions (Long Face Jumeau and Laughing Jumeau) but I did not do faithful reproduction. I painted the eyes instead of using glass paperweight eyes and the lashes and brows and not either true to the original nor really a modern style either. So I have broken all of the rules here, but I enjoy these dolls and they will stay with me.


Wendy also created some incredible wigs for a pair of original porcelain dolls I did. I am still trying to figure out how to put their heads onto their bodies ( right arm isn't working too good right now) , but I hope to have them finished soon and will post. They are looking spectacular.


I couldn't resist. I included are some pictures of the heads waiting for bodies and clothing.


Sunday, February 20, 2011

Can you really see ?

This title probably sounds ridiculous, but I have a hard time deciding if I am getting the affect I am after when I paint. I think the reason I paint with oils is so I have to wait until a layer dries, and I can stare at what I have done to decide the next step. So color on this picture isn't great, but I think I need to stare at these heads a while to know what the next step will be.... I want to colors on these dolls to be transparent, delicate, and not too bold. I am not sure I have that yet.

Sunday, February 06, 2011

Progress on AFIC dolls


This is a self-serving posting. I want to track my progress on these three dolls I want to bring with me to the April AFIC conference. So as you can tell, I just got started on painting them. in oils I am trying to pursue the painterly,portrait style, so am doing this slowly, with layers, and letting them dry before adding the next. It probably looks like I haven't done anything! I have some base skin and hair tone on, and some blushing . Probably I will tackle the eyes next, and then go over everything again to harmonize, blend, and add depth. Also I just got some excellent advise from a trusted artist friend, to focus on the faces and add as much expression as possible and pursue a simple costuming strategy... I want to follow this , so I am putting it down in this posting!

Sunday, January 30, 2011

Baked Heads


I am refining some sculpts that I want to turn into dolls for the upcoming AFIC conference in Columbus this April . I am not sure about you, but I get a lot of teasing from the family when I am baking heads . These gals are getting the final once over, sanding, finding imperfections or holes that need filling, more baking , more sanding, and hopefully will get their gesso tonight.
I should add, please ignore the dirty oven. I have more important things to do than scrub the oven this weekend, like working on these gals!
I have a theme in mind, "Kindred Spirits" , a color scheme, and lots of fabrics to keep me inspired. My road block is designing a better cloth body than my default muslin box body. Since this is a fabric figures conference, I have decided to challenge myself to creating a better all cloth body design to go with these heads. Any ideas you wish to share or resources on body sculpting, woven cloth versus knit cloth, etc. These will be 15-16 inches dolls, just to give you some idea of scale. If you are not familiar with my work, my stuff is folk art style, but I do try to have realistic proportions, etc.

Saturday, September 25, 2010

UFO Completed! Spring Fairy Doll


I think this one is finished. I learned alot and think I will explore the design a bit more. I might even sculpt a skirt portion and make a mold , we shall see! I think having a theme and knowing what will go into the skirt space is important for the next version. I have some ideas here, but mostly they are too elaborate. It may be a good design to incorporate more fabric and embellishing methods too. This idea is used alot by doll makers, so think I should spend some time thinking about how to make it more reflective of my imagination.
I have one more gourd UFO (eg unfinished objects, the infamous boat lady) but its nice to see this one to completion.

Tuesday, September 07, 2010

Gourd Doll a Fairy ?


This piece has been a lot of fun. This weekend I started playing around with the niche and going through my treasures to see how I might embellish this... its been so much fun to play with my beads, vintage jewelry collection, and trims
The tiny gourd baby I created last night from some china painted miniatures I made several years ago. I sculpted the body from Apoxie sculpt, paper- mache'd the body, and touched up with a little antique gold inks. The baby is lying in a paper-mached egg gourd with a vintage brass dragon fly and moth . I think the larger figure needs more embellishments, and am still sorting through my treasures. This is the fun part!

Sunday, August 29, 2010

Playing With Heads Again


Hmmm, interesting weekend :) Instead of painting on the gourd doll as I intended, I got side tracked with sculpting with paper mache. If you refer to my post about creating molds for the Laura doll, I need to sculpt arms and legs for that doll. I decided I needed to make a prototype to figure out what size arms and legs would be appropriate. I had putty molds of the shrunken head, I though I could use them as press molds to get a head the correct size. As you may have expected, press molds are difficult to work with, and of course I ended up resculpting the face ..... but now I have something approximately the correct size to prototype a cloth body and make arms and legs. Other lessons learned, this validates the whole idea of refining the sculpt in wax from the putty molds. These papermache heads don't have nearly the detail that the wax sculpt has, and I am already tired of sanding the papermache! But it was an enjoyable weekend. Maybe I can discipline myself to paint next weekend. I wish all of you time to enjoy these last days of summer. Fall is right around the corner.

Tuesday, August 24, 2010

The Hobbiest's Nightmare Multi-Tasking or is it Multiple Personality Disorder

I am not sure if I will published this blog entry. Right now I am writing it as self-therapy and I doubt if this could be interesting to anyone but me. After all everyone does creative things for different reasons and my reasons are different from yours. But here it is. I MUST create stuff just like I MUST make music. I put it in same category as eating my vegetables, excercising and watching movies. These things make me feel better and enjoy life. I am not paid for any of these activities but that doesn't mean I won't do them.

The competing interest is my day job. I love my day job, spent years refining the skills I use there, and think society as a whole benefits from my efforts. Bottom line, I am not quiting my day job just because I like to sculpt, paint and play music. BUT how can one find the discipline to fit in all this stuff into a 24 hour day ? How can you stretch and grow as an artist (or musician) if you only have time to indulge once every two weeks ?

And here is the rub. I have always been a goal directed person, probably because I am really lazy. If I didn't have goals I would stay in bed all day with the remote control, laptop and phone nearby. But my artistic goals do not match a twice a month schedule and therefore I ended up feeling frustrated.

Sunday, August 22, 2010

More on the Gourd Doll


I woke up in a mood today. For those of you who are irritated with whining, you may wish to skip this paragraph. But needless to say there have been complications in my life that have made finishing art projects difficult. I had to unpack my studio for my daughter to move in, and the studio things have been moved around so often, I can't find anything anymore, and I don't have a place to work. But because I was in a mood (crabby), I wasn't going to let these things stop me. So I went to Joanns, purchased some replacement brushes and mod-podge and decided to dive into the gourd doll UFO (unfinished object).


So I pulled out all of the napkins and special papers I could find, and was happy I did stick to the rose napkin I had intended to use. I then decoupage the napkins to the dolls niche. I am a little nervous since I am not sure what I am going to put into the niche... have some ideas but they are still percolating.


I then laid out some basic colors into the figure with oils. I will need to buy a better lines brush to get the details, so this layer ended up just being the undercoat. I will detail next time I am in the pissy mood :)

Saturday, August 21, 2010

New Materials and Molding Techniques


New Materials And Molding Techniques by Kristen Strand-Tibbitts

The picture on the left is the original 30 inch prototype Laura doll. The picture on the right is the Hydroshrink cast of face portion of Laura from the waste mold
The picture on the left is the Hydroshrink heads after dehydrating and shrinking for 6 days. The picture on the right is one half of the mold created from Compsimold-LT
This article is not exactly related to Softies, nor cats and dogs. Although I would argue you could use some of these molding techniques to create molded felt animals like R.John Right!

I attended a private class at Gail Wilson’s workshop in Acworth New Hampshire this spring, where my goal was to learn how to shrink a sculpt, create molds, and refine a doll design. The doll in the above picture was sculpted in earthenware clay, and a plaster waste mold was produced. I poured the head in liquid papermache (FLUMO) , added sculpted hair, and painted her in oils. I always like this doll, and call her Laura. She is about 30 inches tall but not my idea of the ideal doll because she is too large. Also since I was focused on making a pretty face, I did not have any plan on how to attach her head or create a body. I was interested in learning how to shrink down a sculpt, and refine some of my mold making skills and get an overall doll design, for the new and improved Laura doll. We agreed to break this into several sessions, with the first step shrinking down the doll to be about a 15-16 inch doll.

The initial plan of action was very traditional. We could make a putty mold of the Laura doll head, and pour the head in wax. This two part putty mold is a quick and easy method to make molds from originals. It’s a flexible material so its other advantage is you can unmold something with undercuts like Laura’s hair I purchased the putty from http://www.alumlite.com/ . This strategy would be to use the putty mold to cast a wax head, while solidifying, it would shrink a bit, and then one would create another waste mold in plaster and then repeat the process. Gail calculated we would need to do this 5 times to get a doll of about 15-16 inches. However polymer chemistry save the day, and Gail identified a new product called Hydroshrink (http://www.sculpt.com/) which when poured into a mold, the item will shrink 51%. This implied we could do the shrinking in one step!

I had a plaster waste mold of the original doll, which we could cast in Hydroshrink, but I also had a porcelain head that I poured and fired from the original waste mold so this head was 16 % smaller than the original. We decided we would try both, so as to increase the odds of getting a head the size we wanted.

We needed to make a mold of the porcelain head, and here again Gail found another miracle material. We used a product called ComposiMold-LT (http://www.compositherm.com/) which is a hard gel like substance that you can melt on the stove or microwave, and in its hot , liquid state use it like plaster to make molds. The advantage of this material is it is easy to use, and can re-use this to make additional molds. I just cut it up , re-melt, and reuse. So this composi-mold when cooled was used to cast another Laura in Hydroshrink. As it dehydrates and shrinks, it becomes a transparent yellow-ish color. The second photo shows the Laura faces after a week of dehydration and shrinking. According to the website, dehydration/shrinking can take up to 14 days.

So early this summer, my heads have shrunken, and I made putty molds with a product you find here: http://www.alumilite.com/ProdDetail.cfm?Category=Silicone%20Rubber&Name=Mold%20Putty. This stuff is pretty good for a starting point to impove a figure, but you wouldnt want to use to cast doll parts. I poured the putty molds with Medium Firm sculpting wax purchased at Willow Products, attached each side by slightly melting the wax with an embosing gun, and pressing together . There were a few rough edges to smooth, but all in all it looks good. The last images shows wax doll with sculpted in using a softer was (Ether) sold at Willow Products (http://www.willowproducts.com/) .


Currently I am trying to figure out what size arms and legs go with this head. I will try to keep you poseted

Sunday, October 04, 2009

Progress on the Gourd Doll


I finally got going on this gal during a miserable rainy day. As you can see from the pictures, I am just trying to get the rough shape in and have lots of refining to do, but I can see where I am going with this figure. I am sort of disappointed since I had a very specific idea in mind when I started her, but my hands created something else. I am not disappointed, as much as irritated that I spent so much time thinking about how I wanted this doll to look, and now its going in another direction! I count this as evidence that I am still quite a beginner in this doll making adventure since I don't seem to be able to design. My fingers just do what they want to do. I intended for her to have a primitive folk art look, but she's looking a little Victorian to me right now... maybe the painting will help! I want to put put some tiny dolls in the space in her skirt. I have a nice collection of Gail Wilson miniature dolls that would look like nice, but of course I want to try my hand at making my own.


Sunday, July 26, 2009

The Surprise doll using a Gourd


This doll has been in my head for a long time, and is coming together at a frustrating slow pace. I know part of the problem is I have been thinking of her for too long, and have too many ideas. The other immediate problem is I have a finger in a splint, and can't even hold a paint brush, let alone sculpt. The original inspiration came from antique and antique reproduction surprise dolls, similar to one Jean Nordquist's describes in her 'Alice' booklet. When I started sculpting with gourds, I knew I wanted to try this using a gourd. So in summary, this is where I am at. I started with a gourd that had a nice shape for a skirt, and cut it. This gave me an estimate of how tall the doll would need to be I next create sort of stick figure armature of the doll, with simple wire legs, arms, and body. I added some polymer clay to the body region, mostly to give the whole unit some substance so that I could stick it into the gourd and judge by eye dimensions. I then cut the opening to the gourd that will contain the inside portion, or surprise area. Constructing the inside piece that will contain the little scene in her skirt was a little fiddly, but I did it with card board, snipping here and there so that it will fit inside the gourd. To give structural support to all of this , I covered the cardboard with apoxie sculpt ( that grey stuff). I did this in stages, in part so that I could keep adjusting the shape by checking if the unit still fit inside the gourd skirt. Its actually a tight fit, and I may need to trim it back carefully. The last element, of course is the the dolls head, and here is where I am going nuts. Originally, I wanted to use the head I sculpted and made a mold of (see last blog entry), but I admit I started sculpting another head before I injured my finger. I am still leaning towards using the head I sculpted and molded, and for the mock up picture have included a painted version. The head seems a little large to be in proportion, but I know I can compensate a little when I sculpt in the torso... so I am not sure. Right now I am off to the drug store to get some latex gloves to put over my splint to see if I can work with the apoxie clay... I just can't stay away from this doll any longer
So what will go into the the little niche in the gourd skirt ? Well this is a problem, since I have come up with way too many ideas. I think I will wait until I have the components sculpt and then choose my direction. I have decided that it will have a fairy tale theme, but I don't know if I will sculpt tiny miniatures, or use my collection of paper ephemera and do some type of shadow box type thing.... or should I paint my scenes? I do have the silk fabric to make the dress and some pretty velvet leaves, tiny silk miniature flowers, etc. This should be fun!


Sunday, March 08, 2009

Starting too many new projects


I know I haven't been posting. I also haven't done much doll making since last March and not any sculpting. The black-out was coincident with starting a consulting business (programming, not art!). Ironically, the sculpting bug has come back with a vengeance even though I am really busy right now with work and preparing for my son's wedding. But when Lady Muse talks, I can't help but listen.

On the right is a sculpt I did this past January to take along to a mold-making class at Gail Wilson's New Hampshire workshop (http://www.gailwilsondesigns.com/). I know the picture isn't much... but I figure it was important to post something! I had a semi-private class with two other artists. The idea was to bring a piece, and Gail would teach us how to make plaster molds for casting sculpts in either paper mache (FLUMO) or even porcelain. I did this head, a shoulder plate, hands and feet. She will make an 11 inch doll. I have successfully poured the molds with FLUMO, and papermache slip that Gail sells and am cleaning the parts. I hope to show pictures as I work on her. Cleaning has ended up being a huge job, since I didn't listen to advise and sculpted separated head and shoulderplate so that her head will move. Now I have to sand/refine the shape of the neck and shoulderplate so the head glides easily. Not a big deal, but its painstaking work. I have a new programming assignment ( I work at home) so that I sneak off to sand the parts during my trips to the microwave to zap my coffee or during bathroom breaks..... then feel guilty since I need to be programming. I wish I could justify taking a week off just to play with my art projects, but that would be irresponsible.

The other two projects are still in the gathering stages, so I will post them when I have photographs of something in progress. One is a challenge to a Fantasy Art Guild I recently joined, and it will involve an idea that has been in gestation for over a year. I feel like an overdue mother, just dying to give birth to this doll.. The last project is an online sculpting project with Marilyn Radzat (www.thatcreativeplace.org/). My intention is to post more frequently, and try to regain some focus on my art now that the business side of my life is in stasis.

Thursday, March 20, 2008

Easter Ornament Exchange


One of the internet news groups I am on had an Easter ornament exchange. I got very lucky and was assigned a good friend as my partner. I wanted to do something special, since she is a special buddy, but my creative muse wasn't sharing any ideas... but low and behold, right at the last minute, I thought of this egg design based on an online class I had taken with Marilyn Radzat ( see fairy bower pictures further down this blog). Anyway the egg gourd I cut, and placed a very thin coating of apoxie sculpt in the inside of the gourd. I put a base coat of ivory acrylics , and then put pink and green pearlescent paints on top of it to give it an abalone look. The outside is cut up glass tiles in apoxie sculpt, with micro beads pressed in the 'grout' . The Kewpies dolls I had laying around, I china painted them, wigged and dressed them. I think its looks pretty cute! My friend like them too. I kinda when nuts too, and ended up making 9 of them and have sent them out to friends and family. So lady muse didn't abandoned me, but I do wish I thought of it earlier...